
Vegan, FODMAP Friendly Tropical Fruit 'Cheesecake'
- Koka Health

- Dec 10, 2020
- 2 min read
Updated: May 18, 2024
If you like cheesecake, but have an intolerance to dairy you will love this raw food recipe!
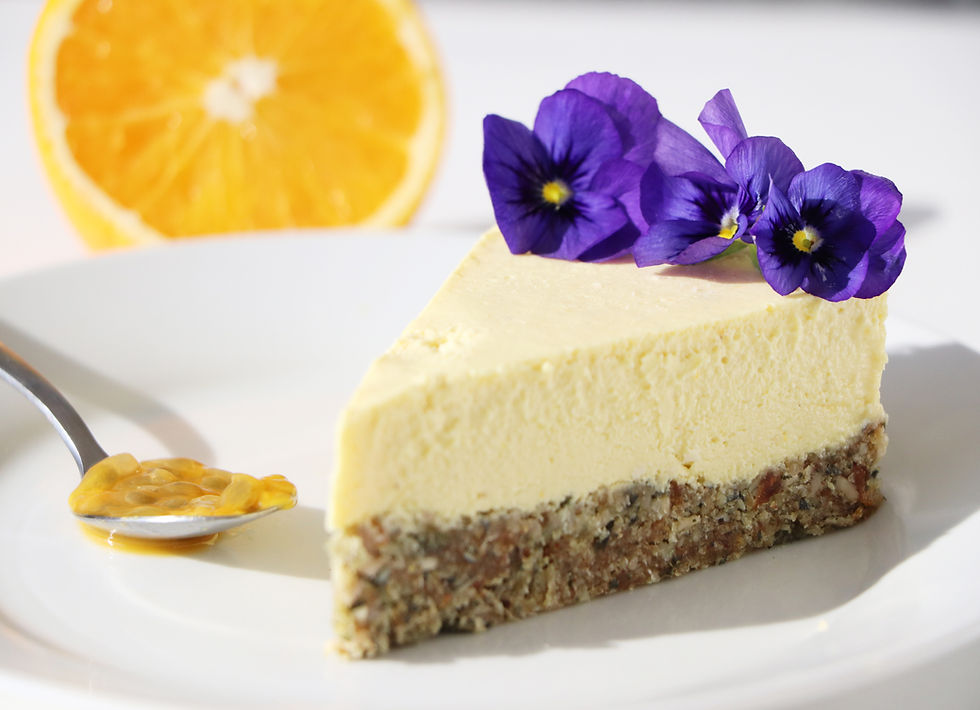
Its a vegan, wholesome, 'tummy friendly' blend of fresh and dried tropical fruits on a delicious, chewy coconut base. A good choice for those of us with Celiac disease, IBS, a wheat allergy or gluten sensitivity. Best thing is its body nourishing but also extremely satisfying. This cheesecake is stored in the freezer; so a great go to desert to immediately satisfy those with a discerning sweet tooth!
I think you will agree that this cake also looks gorgeous too. I used edible flowers to dress my tropical cheesecake. What will you choose to decorate your cheesecake? You can unleash your creativity with your own toppings.
If you decide to give this recipe a go, please log into the members area and share your thoughts, pictures and recipe tweaks. Good luck!
Notes before we get cooking!
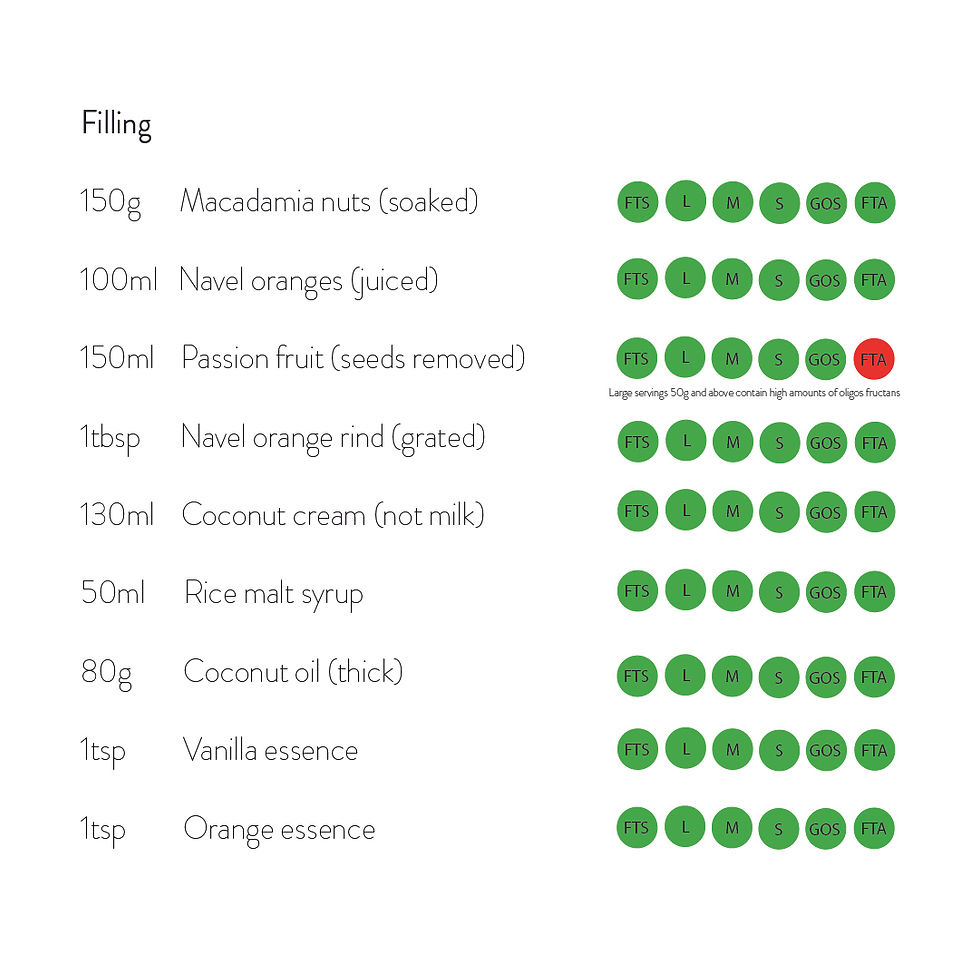
FODMAP red, amber green rating reflects the total amount of Fructose (FTS), Lactose (L), Mannitol (M), Sorbitol (S), Galactooligosaccharide (GOS) and Oligos Fructans (FTA) in the TOTAL volume/weight of the ingredients used in the recipe.
This recipe makes approximately 8 servings of cake. How many slices of this cake you eat is totally up to you!
I'm a big fan of simple recipes that don't need fancy equipment. For this recipe it does help to have a good blender, a strainer (for passion fruit) and a 8 inch springform cake pan (or one with a push out base).
Ingredients:

Method
Step 1.
Soak the 150g of Macadamia nuts in water for at least 20 minutes.
Step 2.
Soak the desiccated coconut in the 30ml of orange juice for at least 20 minutes.
Step 3.
Use a blender to mix together all the ingredients for the base. The mixture should be quite fine, moist and sticking together when molded with the hands.
Step 4.
Press the mixture firmly into the base of your tin.
Step 5.
Use a blender to mix together all of the ingredients for the Filling. The mixture should be thick but very smooth.
Step 6.
Pour the mixture on top of your base.
Step 7.
Pop the cake in the freezer for a minimum of 3 hours.
Step 8.
Remove from the freezer and release from the tin. Allow to soften for 10-15 minutes before cutting into slices. Serve after 30 minutes.
Step 9.
Return any surplus slices to the freezer individually wrapped.


Comments